Made for Play
Explore child development through play, find inspiration for your next DIY project, and discover tips for selecting the perfect toys for your little ones.


Latest Articles

Mother's Day Crafts & Activities for Kids
Fun & Easy Ideas to Celebrate Mom Mother’s Day is the perfect time for children to shower Mom with love—and what better way to do that than with some easy crafts and fun activities that create lasting memories? If you need inspiration, we’ve got creative ideas that will make Mom feel extra special. And don’t worry, no fancy supplies or stress required! Easy Mother’s Day Crafts for Kids Moms love to receive handmade gifts from their little ones! These simple Mother’s Day art projects are a fun way for kids to make something special that Mom will cherish forever. Handmade Mother’s Day Cards A store-bought card is nice, but one made with tiny hands is even better! Let kids go all out with markers, stickers, and whatever crafty supplies you have on hand. They can add a heartfelt message, a drawing of Mom, or even a fun pop-up surprise inside. “Reasons I Love You” Jar This simple but meaningful craft is a gift Mom will treasure. Have kids write (or dictate) reasons they love their mom on small slips of paper, then fold them up and place them in a decorated jar. From lighthearted (“You make the best pancakes!”) to sentimental (“Your hugs always make me feel better”), these little notes will make her smile every time she pulls one out. Thumbprint Family Tree Canvas This keepsake-worthy craft turns little fingerprints into a beautiful family tree. Start with a blank canvas and paint a simple tree trunk and branches. Then, have each family member add their thumbprint as a “leaf” using different paint colors. Add names next to each print for a personal touch. It’s a one-of-a-kind masterpiece Mom will love. Fun Mother’s Day Activities for Kids Beyond giving Mom gifts she’ll cherish, Mother’s Day is also about making her feel special by spending quality time together. These fun and simple activities let kids take the lead in planning a day Mom’s sure to love. Playhouse Garden Surprise @the.rosie.home Creating unforgettable moments with the @KidKraft Riverscape Playhouse! 🌸🌿 It’s the perfect way for our family to bond and get outdoors, encouraging classic, screen-free play that kids can enjoy all year round. From planting flowers in the garden boxes to pretending they’re in their very own world inside, this playhouse brings fun and imagination to life! ✨ Made to last for generations, KidKraft products are crafted with care and quality, so you can count on them for outdoor adventures year after year. 🏡 #KidKraft #RiverscapePlayhouse #BackyardFun #KidKraftPartner #Ad ♬ Happy Fun - Korandrino What’s better than a bouquet of flowers from your local florist? A playhouse that can be used as a flower shop for Mom and the kids to enjoy together! If your little one’s playhouse has built-in garden boxes, turn it into a sweet and simple Mother’s Day activity by picking flowers from the yard or garden together and creating a special flower bundle. Then, plant the blooms side by side in the playhouse planters to brighten up the space—and set up a pretend flower shop while you’re at it. It’s a fun, hands-on way to bond and make lasting memories while getting a little messy. Mother’s Day Breakfast in Bed Let Mom start her special day with a little extra relaxation and a delicious homemade breakfast. Kids can take charge (with a little help, depending on their age) by preparing a simple tray of fruit, toast and juice or setting up a pretend feast with their play kitchen. Outdoor Picnic & Storytime Turn Mother’s Day into a mini outdoor adventure with a cozy picnic in the backyard or at a local park. Pack some favorite snacks, grab a comfy blanket, and bring along a few of Mom’s favorite children’s books. An outdoor picnic with some reading baked in is the perfect way to unwind, cuddle up, and enjoy some quality time together. Final Thoughts The best Mother’s Day gifts are the ones made with love and shared with joy. Whether it’s a heartfelt craft, a special meal, or a fun outdoor activity, these simple ideas help kids show Mom just how much she means to them. And if you’re looking for the perfect playhouse, pretend kitchen, or outdoor setup to make these moments even more magical, you’ll find KidKraft products are designed for creativity and fun!

5 DIY Learning Games for Your Toddler
Looking for fun and easy ways to keep your toddler engaged while learning at home? DIY learning games are a great way to help your little one develop important skills like problem-solving, coordination, and creativity—and all without spending a fortune.Below, find out the benefits of learning games for toddlers and get some ideas for budget-friendly DIY learning games you can create with items you likely already have around the house. How Learning Games Benefit Toddlers Learning games for toddlers offer a range of benefits that go beyond just keeping your little one entertained. At this age, their brains are developing quickly, and play is one of the most effective ways for them to learn.Games that involve sorting, stacking, matching, or problem-solving help build cognitive skills like memory, attention, and logical thinking. These activities also boost language development since toddlers learn to follow instructions, ask questions, and expand their vocabulary while they play.Motor skills can also be improved through learning games. Fine motor skills, like grasping objects or manipulating small pieces, are strengthened during hands-on activities. And games involving running, jumping, or balancing enhance gross motor skills.Learning games encourage social skills too. When toddlers play with others—whether siblings, friends, or parents—they practice sharing, communicating, and taking turns. 5 DIY Toddler Learning Games Here are a few easy, affordable DIY learning games you can put together at home to keep your toddler engaged and learning: Color Sorting Cups Grab a few plastic cups or containers and colored pom-poms or buttons. Label each cup with a different color, and have your toddler sort the items by matching the colors. This game strengthens color recognition and fine motor skills. Line Walk Create a "balance beam" indoors by creating a line with painter’s tape on the floor and have your child walk along the tape, trying to keep their balance. Write numbers or letters along the tape and have them say each one as they step on it for more learning. This game helps with both gross motor skills and letter/number recognition. Shape Match Puzzle Cut different shapes out of cardboard or paper and trace the outlines onto a larger piece of paper. Have your toddler match the shapes to the outlines. This helps with shape recognition, spatial awareness, and problem-solving. Clothespin Counting Write numbers on index cards. Have your toddler clip the corresponding number of clothespins to each card. This is a great way to practice counting while working on fine motor skills and hand-eye coordination. Pom-Pom Races Set up a "racetrack" on the floor with painter’s tape and use straws to blow pom-poms from start to finish. You can make it a fun competition or encourage your toddler to time themselves. This game encourages focus and helps develop breath control and motor coordination. Plus, it’s fun! These activities are simple to set up but offer big learning rewards. Your little one will likely want to play these over and over!For more fun ways to entertain your toddler while encouraging their growth and development, shop toys at KidKraft.

How to Plan Summer Camp at Home: DIY Fun for Kids
If your kids won’t be going to camp this summer, create a DIY camp at home that they’ll be sure to remember! This fun adventure provides a unique opportunity to blend learning and fun without leaving the house and enables you to enjoy more quality family time together!Tailoring activities for your at-home summer camp is cost-effective and adds a personal touch that commercial camps can’t offer. Follow our suggestions below to plan out your summer camp and look forward to a delightful summer filled with growth, discovery, and family bonding. Setting the Scene: Creating Your DIY Camp Environment Transforming your home into a DIY summer camp environment starts with imaginative decor and fun themes. Garlands, handmade signs, and themed areas reflecting different activities build up excitement and will give your home more of a camp-style look and feel.A welcoming, vibrant atmosphere invites kids into a summer of adventure right in your living room or backyard. Crafting Camp Activities: Engaging Adventures for Every Interest When coming up with ideas for your at-home camp, there are a wealth of DIY summer camp activities that cater to every child’s personality and interests. From exciting hands-on science experiments that fizz and bubble to art projects that nurture their imagination to backyard scavenger hunts, and so much more, the options are endless.Keep puzzles and brain games on deck for those craving a challenge, ensuring each day is dripping with fun yet educational content. For the little athletes, obstacle courses in the backyard will burn energy and build teamwork skills. And for those budding artists, stock up on a variety of art supplies, as well as smocks (or old clothes they can get dirty) and easels.Keep in mind that selecting and adapting activities to suit various ages ensures everyone, from toddlers to tweens, enjoys an engaging, enriching experience. Planning Daily Schedules: Structuring Your Camp Days When planning your DIY summer camp at home, you’ll want to balance your days with a mix of dynamic activities and quieter moments. Schedule in snack breaks for nutrition and to keep energy levels high, as well as independent quiet time where each child can choose from a list of silent activities to do on their own (or with you, depending on their age). This list can include activities like reading, writing, drawing, doing yoga, taking a nap, or listening to music or an audiobook.Structuring each day with activities that require different levels of energy, as well as nutrition and mental breaks, ensures happiness and engagement throughout the day and fosters an environment where learning and fun coexist seamlessly. Connecting with Nature: Outdoor Adventures in Your Own Backyard Speaking of daily schedules, be sure to incorporate outdoor time into your day, weather permitting. A few simple ways to get your kids connecting with nature and enjoying the outdoors right in your backyard include: Backyard Picnics You can schedule backyard picnics weekly or even daily. Weekly picnics can be more planned out and have a menu like a traditional picnic would, while you can add in impromptu “picnics” on any given day by just taking your regular meals or snacks outside.Picnics are an easy way to get the whole family to spend more time outside. Get one or two kids’ picnic tables and your kids will love having their own special place to eat whenever you picnic in your backyard! Sandboxes Sandboxes are a classic space for kids to play, develop fine motor skills, and foster creativity and teamwork. Fill them with toys that inspire castle-building and treasure hunting. Swing Sets Having a swing set is like having a mini adventure park in your backyard. Kids can spend hours jumping, swinging, and letting their imaginations run wild. Of course, always monitor play closely and regularly inspect equipment for safety. Campfire Stories and Songs: Evening Entertainment for All End the day relaxing around a campfire in your yard. Gathering around a blaze provides the perfect cozy spot for you to roast marshmallows, take turns telling campfire stories, and sing fun campfire songs. You can also grab a favorite picture or chapter book off your bookshelf and read aloud by the light of the campfire or have kids help with flashlights. Get Planning! Now that you’ve got some suggestions for creating a memorable DIY summer camp at home filled with customized activities each family member will enjoy, put your plan together and start stocking up on the supplies you’ll need. Explore KidKraft's collection for the perfect outdoor play equipment to make your DIY camp dreams a reality

7 DIY Sandbox Ideas for Creative Play
Sandboxes are a summer play staple. They let kids get imaginative and a little messy outdoors while providing numerous benefits in the process! Get the most out of your sandbox this summer with these easy backyard DIY sandbox ideas for creative play. 1. Fossil Dig First, have kids create their own “fossils” indoors. Use a few small, plastic animal toys to create imprints in modeling clay. Let the clay dry completely; then, bury their fossils in the sandbox. Provide your little paleontologists with some small shovels and sieves for their search. They’ll also love dusting off their finds with paintbrushes! 2. Sandbox Volcano Take the classic baking soda volcano outside for even more fun. Give the kids some water and have them construct a volcano shape in the sandbox (be sure to leave a hole on top and some space in the middle). Then, pour in the baking soda, followed by colored vinegar, to create a volcano explosion! 3. Ice Fun Ice cubes in the sand box—simple yet surprisingly entertaining! Kids will love seeing how the sand sticks to the ice and watching the ice slowly melt as they play! 4. Colorful Sand It’s easy to DIY your own colorful sand! You’ll just need some food dye, water and gallon zipper bags. Mix a few drops of food coloring with two cups of water in the bag. Add sand and shake! Once the sand has absorbed the colored water, you can let it dry in the sun or just add it back into the sandbox wet and start playing! 5. Sand Letters Finger drawing letters in a medium such as sand or shaving cream is a classic preschool activity. It’s much easier for toddlers and young preschoolers to start “writing” with their fingers since they still lack the fine motor skills to control a pencil well enough to write. By practicing writing in the sand, they can still build familiarity with the shape and significance of letters, giving them an edge when they’re ready to write for real. Simply provide some printouts of letters for them to trace or copy as they play in the sandbox. Older kids can practice spelling short words. 6. Construction Site Sandbox If your little one has some construction toys, put them to use scooping and pouring real sand. Let them find some pebbles, rocks, sticks and other “rubble” to remove from the construction site with their toys. 7. Sensory Sandbox Sandboxes are already a great form of sensory play, especially when you add extra tools that let kids dig, sieve, scoop, pour and build. Increase the fun by adding some of your go-to sensory bin fillers for the kids to search for in the sand. Just be sure to choose objects that won’t spoil or mold if they get left in the sandbox. Still looking for the perfect sandbox for your backyard? KidKraft’s wooden sandboxes are cute, sturdy and big enough for some major digging adventures! Once you have your sandbox, determine how much sand you need for your sandbox and the best way to keep your sandbox clean. DIY Sandbox FAQ Looking to take the DIY route and build a sandbox? The below FAQs will help you get started. How to build a sandbox? When making a DIY sandbox, choose a level spot, then use wooden boards (like 2’ x 6’ or 2’ x 8’ lumber) to frame it and secure the corners with screws or brackets. Line the bottom with landscape fabric for drainage, fill it with play sand, and consider adding a cover to keep debris and animals out. How do I find sandbox plans? You can find sandbox plans online by searching DIY websites, Pinterest, or home improvement stores. Look for free printable plans or video tutorials that match your space, budget and skill level.

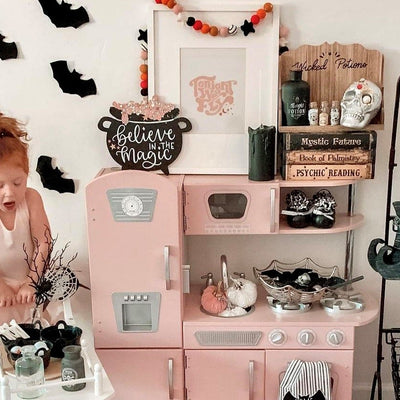
7 Halloween Ideas for Toddlers
No need to get spooked by Halloween activities that cost an arm and a leg or take hours to prep. These Halloween ideas for toddlers are easy, cheap, and most importantly super fun for your favorite little monsters! Easy Witch’s Brew From Toddler ApprovedIf you’ve ever made “Nature Soup” in your backyard, you know how oddly entertained toddlers are by adding random objects to buckets of water and stirring away. All you need to turn that “soup” into a spooky witch’s brew is a few inexpensive Halloween-themed objects. This version uses eyeball “ice cubes,” plastic spiders, and fake cockroaches, but anything you have on hand works! If you have any witches’ hats and cauldrons around, be sure to use them to add to the fun! Pumpkin Bath From Busy ToddlerDo pumpkins need a bath? Nope. Will that stop your toddler from absolutely loving the responsibility of bathing the pumpkins? Nope. They’ll love it. Just fill up your sink with some water and suds, toss in a few small pumpkins and hand the kiddos a few scrub brushes or rags. Jack-o-Lantern Sensory Squish Bags From Fantastic Fun and LearningSensory activities are great for toddler engagement. The only major downside is they tend to be… messy. Like sometimes really, really messy. But not these easy jack-o-latern sensory bags. All you’ll need is some yellow or orange food coloring, corn syrup or cheap hair gel, and black felt for the jack-o-lantern face. We like the approach of taping it to a window, so the light can shine through as they squish the orange “pumpkin” gel and rearrange the jack-o-lantern’s face. And the best part? All the mess is contained in the bag, so you can get a few things done while they play! Spider Stamping From Crafty MorningIs there anything better than activities that are free and ridiculously easy? As long as you have some paint and paper somewhere (and what toddler parent doesn’t?), you can make these easy spider stamps with almost no prep or extra cost. Just cut a few slits into an old toilet paper roll, dip it into the paint, and let your little ones stamp away as they create their spiders. Googly eyes add an extra layer of fun...especially if they want to add 8 eyes to each spider! Pumpkin Hammering From Montessori Dad’s WayThis activity has been popping up all over Insta for good reason. It’s endlessly entertaining and helps develop strength and fine motor coordination. Poke some golf tees into a pumpkin (you can use a real one or a foam one), provide some wooden hammers, and let your toddler hammer them into the pumpkin. You can adjust it to their level depending on how deep you make the holes for them. Little ones may need you to push the tees all the way in and then pull them back out. Pour Painted Pumpkins From Homegrown FriendsKids already love pouring and painting, so just add a pumpkin, and you’ve got a Halloween toddler activity that yields surprisingly pretty results. Use white pumpkins and colors that blend well together, and you just may end up with something front-porch worthy. The Switch Witch Part activity, part brilliant way to prevent your toddler from eating 5 lbs of candy on Halloween. Just like Santa and the Easter Bunny, the Switch Witch brings kids special surprises on her favorite holiday. The only catch? She’ll want to “switch” that surprise out for a big bucket of candy! Kids are pumped about their new toy (maybe go for something they’ve had their eye on for a while), and the Switch Witch always leaves a few pieces of candy for the littles to enjoy. You can give the kiddos some control by letting them decide what candy they really want to keep and how much they’ll leave out for the Switch Witch. Turn it into an all-October activity by building up the Switch Witch, drawing your own Switch Witch pictures, or reading a Switch Witch book together.

Country Vista Playhouse DIY with Jessica Haw
KidKraft partnered with @haw_haus for a playhouse DIY. All materials and opinions are her own.Hands down, our favorite thing about social media is getting to see all the gorgeous DIY designs that parents create with KidKraft products. Not sure what we mean? Check them out for yourself! One of our recent favs comes from Jessica Haw of @haw_haus. After taking on tons of projects to update her 1948 home, she’s become something of a DIY-extraordinaire, and that expert touch definitely came in handy when she wanted to customize her sons’ new KidKraft Country Vista Playhouse.The Country Vista’s unique double doors and dual benches make it a favorite for DIY makeovers and family photo ops. But if you’re brand new to the DIY world (or to assembly projects in general), those Insta-worthy playhouses can be intimidating. But never fear – Jessica’s here to guide you through the process. Read our Q&A with the DIY diva to learn all about her experience assembling and customizing her KidKraft playhouse. (Plus, why her boys love it!) We know parents have a ton of choices when it comes to toys. Why was an outdoor playhouse a good product for your kids? With the pandemic, we have been spending the most time ever at home. I believe in buying products that are open ended which means kids can find different ways to play with it over the years. Adding an outdoor playhouse will cultivate imaginary play which is so important for young kids. Would you recommend other parents try an outdoor playhouse for their kids? Yes! An outdoor playhouse for us means more time we can spend outdoors getting fresh air and allows the kids to use their imagination. One day they may use the playhouse as a house, and the next, it may be their school. Having the physical space for the kids will allow them to transform it to whatever they’d like! Tell us about unboxing the Country Vista Playhouse. When I unboxed the playhouse, I was pleasantly surprised that there weren’t as many pieces as I thought since some were already connected. It is important to carefully take out each piece. Parents who are new to DIY projects are sometimes nervous about the assembly process. Tell us about putting together your playhouse! My husband and I put the playhouse together. He did an inventory check to make sure everything was there. There are definitely a lot of screws and nails, but following the manual to T was really helpful. The great thing about building this was you really only need a drill to build it! What’s your favorite thing about the Country Vista Playhouse? I wanted a playhouse that resembled modern farmhouses with a twist and this is exactly what I got! What I love most about the Country Vista Playhouse is that it fits several kids. When we have other kids over for playdates, they can all stand comfortably and fit inside. Also, it is easy to move around the backyard. What fun spin did you add to make the playhouse your very own? I ended up painting the entire home to vicariously mimic what my own childhood dream playhouse would look like! I’ve incorporated elements of my favorite colors including pink, green, and gold. The kids have watched us build the playhouse from the beginning and during the process, so we didn’t have a huge “Surprise!” moment. But as soon as it was ready, they started bringing in their indoor toys and already turned it into an ice cream store. The kids are looking forward to warmer weather and being outdoors utilizing the playhouse in every element! Ready to take on your own KidKraft DIY? The Country Vista Playhouse is a great choice, but it’s not your only option – not by a longshot. The sleek, minimalist design of the Modern Outdoor Playhouse make it another favorite, and ultimately any KidKraft playhouses boasts durable, sturdy wood construction that can easily be painted and customized to match your style. Thanks to clear, thorough instructions and EZKraft Assembly (in select products), now matter which playhouse you choose, you can spend less time assembling and more time customizing and playing! On the hunt for more playhouse inspiration? check out these playhouse decor ideas and follow us on Instagram!
-

Country Vista Playhouse DIY with Jessica Haw
Read more - about Country Vista Playhouse DIY with Jessica Haw within Popular Reads -
7 Halloween Ideas for Toddlers
Read more - about 7 Halloween Ideas for Toddlers within Popular Reads -

7 DIY Sandbox Ideas for Creative Play
Read more - about 7 DIY Sandbox Ideas for Creative Play within Popular Reads


